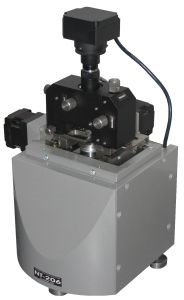
产品详情
文献和实验
规格 :1台
| Measurement modes: Motion patterns at the measurements: - area (matrix); - line; - single point. |
* - or rig required ** - Specialized probes required |
| Scan field area: | from 5x5 micron up to 50x40 microns |
| Maximum range of measured heights: | from 2 to 4 micron |
| Lateral resolution (plane XY): | 1–5 nm (depending on sample hardness) |
| Vertical resolution (direction Z): | 0.1–0.5 nm (depending on sample hardness) |
| Scanning matrix: | Up to 1024x1024 points |
| Scan rate: | 40–250 points per second in X-Y plane |
| Nonlinearity correction : | A software nonlinearity correction provided |
| Minimum scanning step: | 0.3 nm |
| Scanning scheme: | The sample is moved in X-Y plane (horizontal) and in Z-direction (vertical) under stationary probe. |
| Scanner type: | A piezoceramic tube. |
| Cantilevers (probes): | Commercial AFM cantilevers of 3.4x1.6x0.4 mm. Recommended are probes from or . Checked for operation with probes by and |
| Cantilever deflection detection system: | Laser beam scheme with four-quadrant position-sensitive photodetector |
| Sample size: | Up to 30x30x8 mm (w–d–h); extending allows measurement of samples with height up to 35 mm |
| High voltage amplifier output: | +190 V |
| ADC: | 16 bit |
| Operation environment: | Open air, 760+40 mm Hg col., T = 22+4°С, relative humidity <70% |
| Range of automated movement of measuring head: | 10x10 mm in XY plane for micropositioning of probe relative measured sample at step 2.5 micron with optical visual monitoring |
| Overall dimensions: | Scanning unit: 185x185x290 mm Control electronic unit: 195x470x210 mm |
| Field of view of embedded videosystem: | 1x0.75 mm, visualization window 640x480 pixel, frame rate up to 30 fps. |
| Vibration isolation: | Additional antivibration table is recommended |
| Host computer: | Not less than: Celeron® 2.2, RAM 256 MB, HDD 80 GB, VRAM 128 MB, monitor 17" 1024x768x32 bit, Windows® XP SP1, 2 USB port. Recommended: Core i5 or equivalent, RAM 2 GB, HDD 320 GB, VRAM 1 GB, monitor 1600x1200x32 bit, Windows® XP SP2 or higher, 2 free USB port. |
| Software: | Special and the AFM image processing package / are included. |

北京伯英科技有限公司
未合作商家

